单测系列-Python
常用Python单测框架
Unittest
Nose
Pytest
特点
Python标准库中自带的单元测试框架。
Python的一个第三方单元测试框架,带插件的unittest。nose停止维护了,nose2并不支持nose的全部功能。
Python的一个第三方单元测试框架,丰富的插件生态,兼容unittest和nose测试集, 社区繁荣
Mock框架
unittest.mock
unittest.mock
pytest-mock
推荐指数
★★★★☆
★★☆☆☆
★★★★★
若你不想安装或不允许第三方库,那么 unittest 是最好也是唯一的选择。反之,pytest 无疑是最佳选择,众多 Python 开源项目(如大名鼎鼎的 requests)都是使用 pytest 作为单元测试框架。甚至,连 nose2 在官方文档上都建议大家使用 pytest。我们知道,nose已经进入了维护模式,取代者是nose2。相比nose2,pytest的生态无疑更具优势,社区的活跃度也更高。
总体来说,unittest用例格式复杂,兼容性无,插件少,二次开发方便。pytest更加方便快捷,用例格式简单,可以执行unittest风格的测试用例,较好的兼容性,插件丰富。
unittest 基本概念 unittest中最核心的四个概念是:test fixture、test case、test suite、test runner 。
test fixture:表示执行一个或多个测试所需的准备,以及任何关联的清理操作。例如这可能涉及创建临时或代理数据库、目录或启动服务器进程。
test case:测试用例是最小的测试单元。它检查特定的输入集的响应。单元测试提供了一个基类测试用例,可用于创建新的测试用例。
test suite:测试套件是测试用例、测试套件或两者的集合,用于归档需要一起执行的测试。
test runner:是一个用于执行和输出结果的组件。这个运行器可能使用图形接口、文本接口,或返回一个特定的值表示运行测试的结果。
编写规则 编写单元测试时,我们需要编写一个测试类,从unittest.TestCase继承。
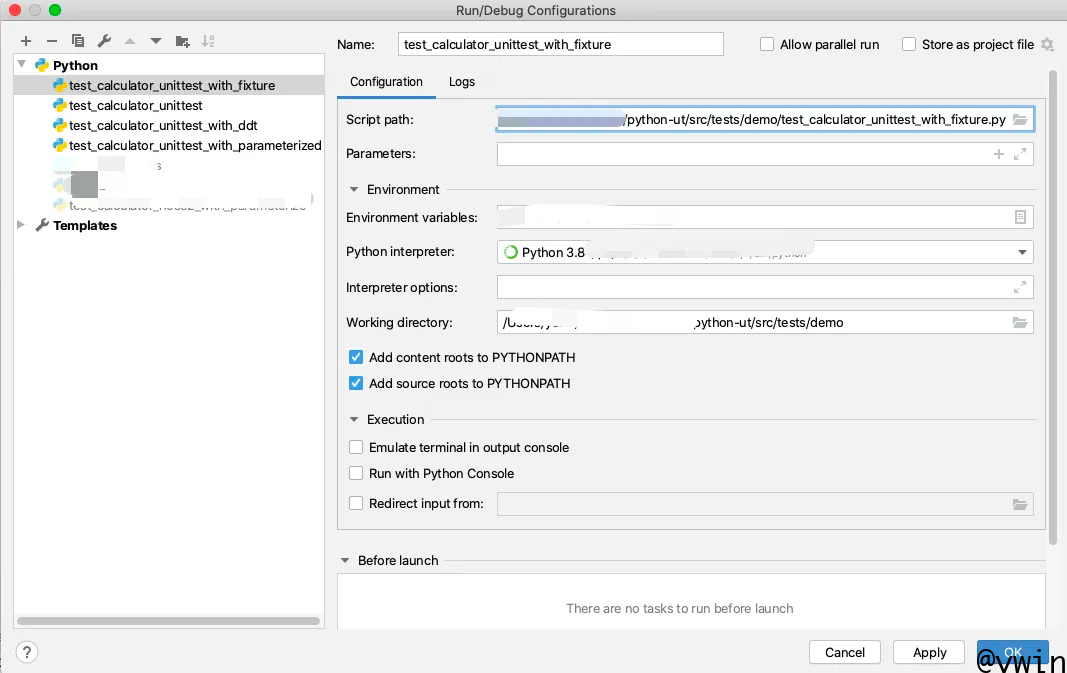
简单示例 目录结构 1 2 3 4 5 6 7 8 9 10 11 12 $ tree . . ├── README.md ├── requirements.txt └── src ├── demo │ └── calculator.py └── tests └── demo ├── __init__.py ├── test_calculator_unittest.py └── test_calculator_unittest_with_fixture.py
计算器实现代码 1 2 3 4 5 6 7 8 9 10 11 12 13 class Calculator : def add (self, a, b ): return a + b def sub (self, a, b ): return a - b def mul (self, a, b ): return a * b def div (self, a, b ): return a / b
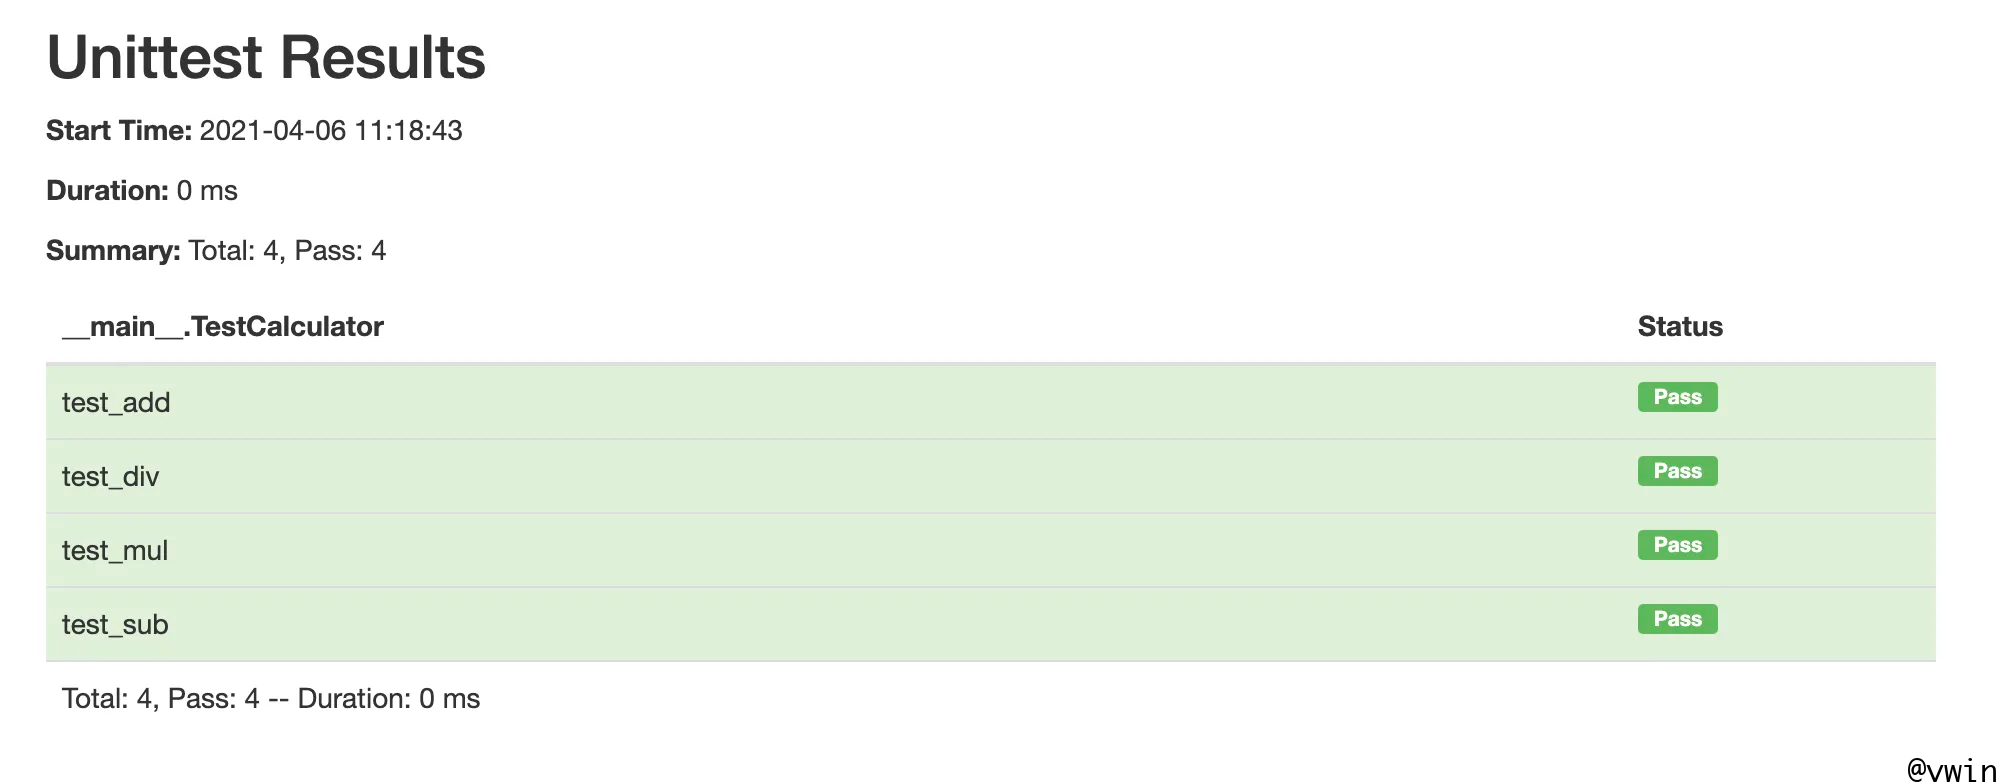
计算器测试代码 1 2 3 4 5 6 7 8 9 10 11 12 13 14 15 16 17 18 19 20 21 22 23 24 25 26 27 28 29 30 31 32 33 34 35 import unittestfrom src.demo.calculator import Calculatorclass TestCalculator (unittest.TestCase): def test_add (self ): c = Calculator() result = c.add(3 , 5 ) self.assertEqual(result, 8 ) def test_sub (self ): c = Calculator() result = c.sub(10 , 5 ) self.assertEqual(result, 5 ) def test_mul (self ): c = Calculator() result = c.mul(5 , 7 ) self.assertEqual(result, 35 ) def test_div (self ): c = Calculator() result = c.div(10 , 5 ) self.assertEqual(result, 2 ) if __name__ == '__main__' : unittest.main() Ran 4 tests in 0.002 s OK
用例前置和后置 基于unittest的四个概念的理解,上述简单用例,可以修改为:
1 2 3 4 5 6 7 8 9 10 11 12 13 14 15 16 17 18 19 20 21 22 23 24 25 26 27 28 29 30 31 32 33 34 35 36 37 38 39 40 41 42 43 44 45 46 import unittestfrom src.demo.calculator import Calculatorclass TestCalculatorWithFixture (unittest.TestCase): def setUp (self ): print ("test start" ) def tearDown (self ): print ("test end" ) def test_add (self ): c = Calculator() result = c.add(3 , 5 ) self.assertEqual(result, 8 ) def test_sub (self ): c = Calculator() result = c.sub(10 , 5 ) self.assertEqual(result, 5 ) def test_mul (self ): c = Calculator() result = c.mul(5 , 7 ) self.assertEqual(result, 35 ) def test_div (self ): c = Calculator() result = c.div(10 , 5 ) self.assertEqual(result, 2 ) if __name__ == '__main__' : suit = unittest.TestSuite() suit.addTest(TestCalculatorWithFixture("test_add" )) suit.addTest(TestCalculatorWithFixture("test_sub" )) suit.addTest(TestCalculatorWithFixture("test_mul" )) suit.addTest(TestCalculatorWithFixture("test_div" )) runner = unittest.TestRunner() runner.run(suit)
参数化 标准库的unittest自身不支持参数化测试,可以通过第三方库来支持:parameterized和ddt。
其中parameterized只需要一个装饰器@parameterized.expand,ddt需要三个装饰器@ddt、@data、@unpack,它们生成的test分别有一个名字,ddt会携带具体的参数信息。
parameterized 1 2 3 4 5 6 7 8 9 10 11 12 13 14 15 16 17 18 19 20 21 22 23 24 25 26 27 28 29 30 31 32 33 import unittestfrom parameterized import parameterized, paramfrom src.demo.calculator import Calculatorclass TestCalculator (unittest.TestCase): @parameterized.expand([ param(3 , 5 , 8 param(1 , 2 , 3 param(2 , 2 , 4 ] ) def test_add (self, num1, num2, total ): c = Calculator() result = c.add(num1, num2) self.assertEqual(result, total) if __name__ == '__main__' : unittest.main() test_add_0 (__main__.TestCalculator) ... ok test_add_1 (__main__.TestCalculator) ... ok test_add_2 (__main__.TestCalculator) ... ok ---------------------------------------------------------------------- Ran 3 tests in 0.000 s OK
ddt 1 2 3 4 5 6 7 8 9 10 11 12 13 14 15 16 17 18 19 20 21 22 23 24 25 26 27 28 29 30 import unittestfrom ddt import data, unpack, ddtfrom src.demo.calculator import Calculator@ddt class TestCalculator (unittest.TestCase): @data((3 , 5 , 8 1 , 2 , 3 2 , 2 , 4 ) @unpack def test_add (self, num1, num2, total ): c = Calculator() result = c.add(num1, num2) self.assertEqual(result, total) if __name__ == '__main__' : unittest.main() test_add_1__3__5__8_ (__main__.TestCalculator) ... ok test_add_2__1__2__3_ (__main__.TestCalculator) ... ok test_add_3__2__2__4_ (__main__.TestCalculator) ... ok ---------------------------------------------------------------------- Ran 3 tests in 0.000 s OK
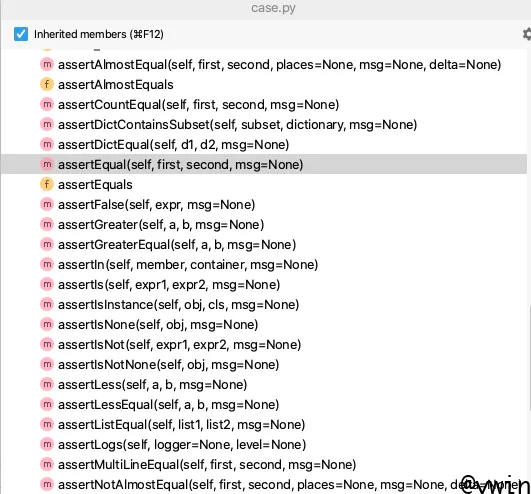
断言 unittest提供了丰富的断言,常用的包括:
assertEqual、assertNotEqual、assertTrue、assertFalse、assertIn、assertNotIn等。
具体可以直接看源码提供的方法:
nose nose已经进入维护模式,从github nose上可以看到,nose最近的一次代码提交还是在2016年5月4日。
继承nose的是nose2,但要注意的是,nose2并不支持nose的全部功能,它们的区别可以看这里。nose2的主要目的是扩展Python的标准单元测试库unittest,因此它的定位是“带插件的unittest”。nose2提供的插件,例如测试用例加载器,覆盖度报告生成器,并行测试等内置插件和第三方插件,让单元测试变得更加完善。
nose2的社区没有pytest的活跃,要使用高级框架,推荐使用pytest,因此下文不做过多详述。
编写规则 nose2的测试用例并不限制于类,也可以直接使用函数。
简单示例 计算器代码 参考unittest的计算器代码部分。
计算器测试代码 1 2 3 4 5 6 7 8 9 10 11 12 13 14 15 16 17 18 19 20 21 22 23 24 25 26 27 28 29 30 31 32 33 34 35 36 37 38 import nose2from src.demo.calculator import Calculatordef test_add (): c = Calculator() result = c.add(3 , 5 ) assert result == 8 def test_sub (): c = Calculator() result = c.sub(10 , 5 ) assert result == 5 def test_mul (): c = Calculator() result = c.mul(5 , 7 ) assert result == 35 def test_div (): c = Calculator() result = c.div(10 , 5 ) assert result == 2 if __name__ == '__main__' : nose2.main() .... ---------------------------------------------------------------------- Ran 4 tests in 0.000 s OK
参数化 1 2 3 4 5 6 7 8 9 10 11 12 13 14 15 16 17 18 19 20 21 import nose2from nose2.tools import paramsfrom src.demo.calculator import Calculatortest_data = [ {"nums" : (3 , 5 ), "total" : 8 }, {"nums" : (1 , 2 ), "total" : 3 }, {"nums" : (2 , 2 ), "total" : 4 } ] @params(*test_data ) def test_add (data ): c = Calculator() result = c.add(*data['nums' ]) assert result == data['total' ] if __name__ == '__main__' : nose2.main()
pytest 编写规则
测试文件以test_开头(以test结尾也可以)
测试类以Test开头,并且不能带有 init 方法
测试函数以test_开头
断言使用基本的assert即可
可以通过下面的命令,查看 Pytest 收集到哪些测试用例:1 $ py.test --collect-only
简单示例 计算器代码 参考unittest的计算器代码部分。
计算器实现代码 1 2 3 4 5 6 7 8 9 10 11 12 13 14 15 16 17 18 19 20 21 22 23 24 25 26 27 28 29 30 31 32 33 34 35 36 37 38 39 40 41 import pytestfrom src.demo.calculator import Calculatorclass TestCalculator (): def test_add (self ): c = Calculator() result = c.add(3 , 5 ) assert result == 8 def test_sub (self ): c = Calculator() result = c.sub(10 , 5 ) assert result == 5 def test_mul (self ): c = Calculator() result = c.mul(5 , 7 ) assert result == 35 def test_div (self ): c = Calculator() result = c.div(10 , 5 ) assert result == 2 if __name__ == '__main__' : pytest.main(['-s' , 'test_calculator_pytest.py' ]) ============================= test session starts ============================== platform darwin -- Python 3.8 .3 , pytest-6.2 .2 , py-1.10 .0 , pluggy-0.13 .1 rootdir: python-ut/src/tests/demo plugins: metadata-1.11 .0 , html-3.1 .1 collected 4 items test_calculator_pytest.py .... ============================== 4 passed in 0.01 s ===============================
用例前置和后置 加上fixture夹具,有几种方式:
将夹具函数名称作为参数传递到测试用例函数当中
@pytest.mark.usefixtures(“夹具函数名称”)
@pytest.fixture(autouse=True),设置了autouse,就可以不用上述两种手动方式,默认就会使用夹具1 2 3 4 5 6 7 8 9 10 11 12 13 14 15 16 17 18 19 20 21 22 23 24 25 26 27 28 29 30 31 32 33 34 35 36 37 38 39 40 41 42 43 44 45 46 47 48 49 50 51 52 53 54 55 56 57 58 59 import pytestfrom src.demo.calculator import Calculator@pytest.fixture() def set_up (): print ("[pytest with fixture] start" ) yield print ("[pytest with fixture] end" ) class TestCalculator (): def test_add (self, set_up ): c = Calculator() result = c.add(3 , 5 ) assert result == 8 def test_sub (self, set_up ): c = Calculator() result = c.sub(10 , 5 ) assert result == 5 @pytest.mark.usefixtures("set_up" def test_mul (self ): c = Calculator() result = c.mul(5 , 7 ) assert result == 35 @pytest.mark.usefixtures("set_up" def test_div (self ): c = Calculator() result = c.div(10 , 5 ) assert result == 2 if __name__ == '__main__' : pytest.main(['-s' , 'test_calculator_pytest_with_fixture.py' ]) ============================= test session starts ============================== platform darwin -- Python 3.8 .3 , pytest-6.2 .2 , py-1.10 .0 , pluggy-0.13 .1 rootdir: python-ut/src/tests/demo plugins: metadata-1.11 .0 , html-3.1 .1 collected 4 items test_calculator_pytest_with_fixture.py [pytest with fixture] start .[pytest with fixture] end [pytest with fixture] start .[pytest with fixture] end [pytest with fixture] start .[pytest with fixture] end [pytest with fixture] start .[pytest with fixture] end ============================== 4 passed in 0.01 s ===============================
参数化 基础知识 如果只有一个参数,里面则是值的列表,比如@pytest.mark.parametrize(“num1”, [3, 5, 8])
参数化测试 1 2 3 4 5 6 7 8 9 10 11 12 13 14 15 16 17 18 19 20 21 22 23 24 25 26 import pytestfrom src.demo.calculator import Calculatorclass TestCalculator (): @pytest.mark.parametrize("num1, num2, total" , [(3 , 5 , 8 1 , 2 , 3 2 , 2 , 4 def test_add (self, num1, num2, total ): c = Calculator() result = c.add(num1, num2) assert result == total if __name__ == '__main__' : pytest.main(['test_calculator_pytest_with_parameterize.py' ]) ============================= test session starts ============================== platform darwin -- Python 3.8 .3 , pytest-6.2 .2 , py-1.10 .0 , pluggy-0.13 .1 rootdir: python-ut/src/tests/demo plugins: metadata-1.11 .0 , html-3.1 .1 collected 3 items test_calculator_pytest_with_paramtrize.py ... ============================== 3 passed in 0.01 s ===============================
参数化标记数据 1 2 3 4 5 6 7 8 9 10 11 12 13 14 15 16 17 18 19 20 21 22 23 24 25 26 27 28 29 30 31 32 33 34 35 36 37 38 39 40 41 42 43 44 45 46 47 48 class TestCalculator (): @pytest.mark.parametrize("num1, num2, total" , [ pytest.param(5 , 1 , 4 , marks=pytest.mark.passed pytest.param(5 , 2 , 4 , marks=pytest.mark.fail (5 , 4 , 1 ] ) def test_sub (self, num1, num2, total ): c = Calculator() result = c.sub(num1, num2) assert result == total if __name__ == '__main__' : pytest.main(['test_calculator_pytest_with_parameterize.py' ]) ============================= test session starts ============================== platform darwin -- Python 3.8 .3 , pytest-6.2 .2 , py-1.10 .0 , pluggy-0.13 .1 rootdir: python-ut/src/tests/demo plugins: metadata-1.11 .0 , html-3.1 .1 collected 3 items test_calculator_pytest_with_paramtrize.py .F. [100 %] =================================== FAILURES =================================== ________________________ TestCalculator.test_sub[5 -2 -4 ] ________________________ self = <demo.test_calculator_pytest_with_paramtrize.TestCalculator object at 0x110813d00 > num1 = 5 , num2 = 2 , total = 4 @pytest.mark.parametrize("num1, num2, total" , [ pytest.param(5 , 1 , 4 , marks=pytest.mark.passed pytest.param(5 , 2 , 4 , marks=pytest.mark.fail (5 , 4 , 1 ] ) def test_sub (self, num1, num2, total ): c = Calculator() result = c.sub(num1, num2) > assert result == total E assert 3 == 4 test_calculator_pytest_with_paramtrize.py:21 : AssertionError =========================== short test summary info ============================ FAILED test_calculator_pytest_with_paramtrize.py::TestCalculator::test_sub[5 -2 -4 ] =================== 1 failed, 2 passed, 2 warnings in 0.04 s ====================
断言 在unittest单元测试框架中提供了丰富的断言方法,例如assertEqual()、assertIn()、assertTrue()、assertIs()等,而pytest单元测试框架中并没提供特殊的断言方法,而是直接使用python的assert进行断言。
assert可以使用==、!=、<、>、>=、<=等符号来比较相等、不相等、小于、大于、大于等于和小于等于。
断言包含和不包含,使用assert a in b和assert a not in b
断言真假,使用assert condition和assert not condition
断言异常,使用pytest.raise获取信息1 2 3 4 5 6 7 8 9 10 def test_zero_division_long (): with pytest.raises(ZeroDivisionError) as excinfo: 1 / 0 assert excinfo.type == ZeroDivisionError assert "division by zero" in str (excinfo.value)
重跑 需要安装额外的插件pytest-rerunfailures
1 2 3 4 5 6 7 8 9 10 11 12 13 14 15 16 import pytest@pytest.mark.flaky(reruns=5 ) def test_example (): import random assert random.choice([True , False , False ]) 执行结果: collecting ... collected 1 item 11_reruns.py::test_example RERUN [100 %] 11_reruns.py::test_example PASSED [100 %] ========================= 1 passed, 1 rerun in 0.05 s ==========================
Mock mock mock原是python的第三方库,python3以后mock模块已经整合到了unittest测试框架中。
如果使用的是python3.3以后版本,那么不用单独安装,使用的时候在文件开头引入from unittest import mock即可。
如果使用的是python2,需要先pip install mock安装后再import mock即可。
Mock一个方法 1 2 3 4 5 6 7 8 9 10 11 12 13 14 15 16 17 18 19 20 21 22 23 24 import unittestfrom unittest import mockfrom src.demo.calculator import Calculatordef multiple (a, b ): return a * b class TestCalculator (unittest.TestCase): @mock.patch('test_calculator_mock.multiple' def test_function_multiple (self, mock_multiple ): mock_return = 1 mock_multiple.return_value = mock_return result = multiple(3 , 5 ) self.assertEqual(result, mock_return) if __name__ == '__main__' : unittest.main()
Mock一个对象里面的方法 分别给出了普通写法和注解写法,以及side_effect关键参数的效果案例。
1 2 3 4 5 6 7 8 9 10 11 12 13 14 15 16 17 18 19 20 21 22 23 24 25 26 27 28 29 30 31 32 33 34 35 36 37 38 39 40 import unittestfrom unittest import mockfrom src.demo.calculator import Calculatorclass TestCalculator (unittest.TestCase): def test_add (self ): c = Calculator() mock_return = 10 c.add = mock.Mock(return_value=mock_return) result = c.add(3 , 5 ) self.assertEqual(result, mock_return) def test_add_with_side_effect (self ): c = Calculator() mock_return = 10 c.add = mock.Mock(return_value=mock_return, side_effect=c.add) result = c.add(3 , 5 ) self.assertEqual(result, 8 ) @mock.patch.object(Calculator, 'add' ) def test_add_with_annotation (self, mock_add ): c = Calculator() mock_return = 10 mock_add.return_value = mock_return result = c.add(3 , 5 ) self.assertEqual(result, mock_return) if __name__ == '__main__' : unittest.main()
Mock每次调用返回不同的值 1 2 3 4 5 6 7 8 9 10 11 12 13 14 15 16 17 18 19 20 21 import unittestfrom unittest import mockfrom src.demo.calculator import Calculatorclass TestCalculator (unittest.TestCase): @mock.patch.object(Calculator, 'add' ) def test_add_with_different_return (self, mock_add ): c = Calculator() mock_return = [10 , 8 ] mock_add.side_effect = mock_return result1 = c.add(3 , 5 ) result2 = c.add(3 , 5 ) self.assertEqual(result1, mock_return[0 ]) self.assertEqual(result2, mock_return[1 ]) if __name__ == '__main__' : unittest.main()
Mock抛出异常的方法 1 2 3 4 5 6 7 8 9 10 11 12 13 14 15 16 17 18 19 20 21 22 23 24 25 26 27 28 29 30 import unittestfrom unittest import mockfrom src.demo.calculator import Calculatordef multiple (a, b ):return a * bdef is_error (a, b ):try : return multiple(a, b) except Exception as e: return -1 class TestCalculator (unittest.TestCase): @mock.patch('test_calculator_mock.multiple' def test_function_multiple_exception (self, mock_multiple ): mock_multiple.side_effect = Exception result = is_error(3 , 5 ) self.assertEqual(result, -1 ) if __name__ == '__main__' : unittest.main()
Mock多个方法 1 2 3 4 5 6 7 8 9 10 11 12 13 14 15 16 17 18 19 20 21 22 23 24 import unittestfrom unittest import mockfrom src.demo.calculator import Calculatordef multiple (a, b ):return a * bclass TestCalculator (unittest.TestCase): @mock.patch.object(Calculator, 'add' ) @mock.patch('test_calculator_mock.multiple' def test_both (self, mock_multiple, mock_add ): c = Calculator() mock_add.return_value = 1 mock_multiple.return_value = 2 self.assertEqual(c.add(3 , 5 ), 1 ) self.assertEqual(multiple(3 , 5 ), 2 ) if __name__ == '__main__' : unittest.main()
pytest-mock 如果项目本身使用的框架是 pytest,则 Mock 更建议使用 pytest-mock 这个插件,它提供了一个名为mocker的fixture,仅在当前测试funciton或method生效,而不用自行包装。
mocker和mock.patch有相同的api,支持相同的参数。
简单示例 1 2 3 4 5 6 7 8 9 10 11 12 13 14 15 16 17 18 19 import pytestfrom src.demo.calculator import Calculatorclass TestCalculator (): def test_add (self, mocker ): c = Calculator() mock_return = 10 mocker.patch.object (c, 'add' , return_value=mock_return) result = c.add(3 , 5 ) assert result == mock_return if __name__ == '__main__' : pytest.main(['-s' , 'test_calculator_pytest_mock.py' ])
mock方法和域 1 2 3 4 5 6 7 8 9 10 11 12 13 14 15 16 17 18 19 20 21 class ForTest : field = 'origin' def method (): pass def test_for_test (mocker ): test = ForTest() mock_method = mocker.patch.object (test, 'method' ) test.method() assert mock_method.called assert 'origin' == test.field mocker.patch.object (test, 'field' , 'mocked' ) assert 'mocked' == test.field
monkeypatch monkeypatch是pytest框架内置的固件,有时候,测试用例需要调用某些依赖于全局配置的功能,或者这些功能本身又调用了某些不容易测试的代码(例如:网络接入)。monkeypatch提供了一些方法,用于安全地修补和模拟测试中的功能:
1 2 3 4 5 6 7 8 9 monkeypatch.setattr (obj, name, value, raising=True ) monkeypatch.delattr (obj, name, raising=True ) monkeypatch.setitem(mapping, name, value) monkeypatch.delitem(obj, name, raising=True ) monkeypatch.setenv(name, value, prepend=False ) monkeypatch.delenv(name, raising=True ) monkeypatch.syspath_prepend(path) monkeypatch.chdir(path)
主要考虑以下情形:
修改测试的函数行为或类的属性
修改字典的值
修改测试环境的环境变量
在测试期间,用于修改和 更改当前工作目录的上下文。
单元测试覆盖率报告
coverage 是 Python 推荐使用的覆盖率统计工具。
pytest-cov 是 pytest 的插件,它可以让你在 pytest 中使用 cpverage.py。
HtmlTestRunner,需要在代码里面写入一点配置,但是报告生成比较美观。
coverage和pytest-cov只需要配置,就可直接使用,不需要测试代码配合。
coverage 安装 详情可参考:https://coverage.readthedocs.io/en/coverage-5.5/
运行 1 coverage run -m unittest discover
运行结束之后,会生成一个覆盖率统计结果文件(data file).coverage文件,在pycharm里可识别为一个数据库:
结果 report 执行结果如下:
1 2 3 4 5 6 7 8 $ coverage report -m Name Stmts Miss Cover Missing --------------------------------------------------------------------------------------------- src/tests/demo/test_calculator_pytest_with_fixture.py 28 16 43% 8-10, 15-17, 20-22, 26-28, 32-34, 38 src/tests/demo/test_calculator_pytest_with_parameterize.py 15 7 53% 9-11, 19-21, 25 src/tests/demo/test_calculator_unittest.py 22 1 95% 31 src/tests/demo/test_calculator_unittest_with_ddt.py 13 1 92% 18
html 会生成htmlcov/index.html文件,在浏览器查看:
点击各个py文件,可以查看详细情况。
html-testRunner 安装 1 pip install html-testRunner
详细说明可参考HtmlTestRunner: https://github.com/oldani/HtmlTestRunner
运行 在代码中加上HTMLTestRunner,如下
1 2 3 4 5 6 7 8 9 10 11 12 13 import HtmlTestRunnerif __name__ == '__main__' :unittest.main(testRunner=HtmlTestRunner.HTMLTestRunner()) 如果是在测试套件中运行,换成HTMLTestRunner即可: runner = HTMLTestRunner() runner.run(suit)
结果 默认会生成reports/ 文件夹,按照时间显示报告:
pytest-cov 安装 详细可参考pytest-cov: https://github.com/pytest-dev/pytest-cov
运行 1 pytest --cov --cov-report=html
或者指定目录:
1 pytest --cov=src --cov-report=html
结果 会生成htmlcov/index.html文件,在浏览器查看,类似于coverage的报告。
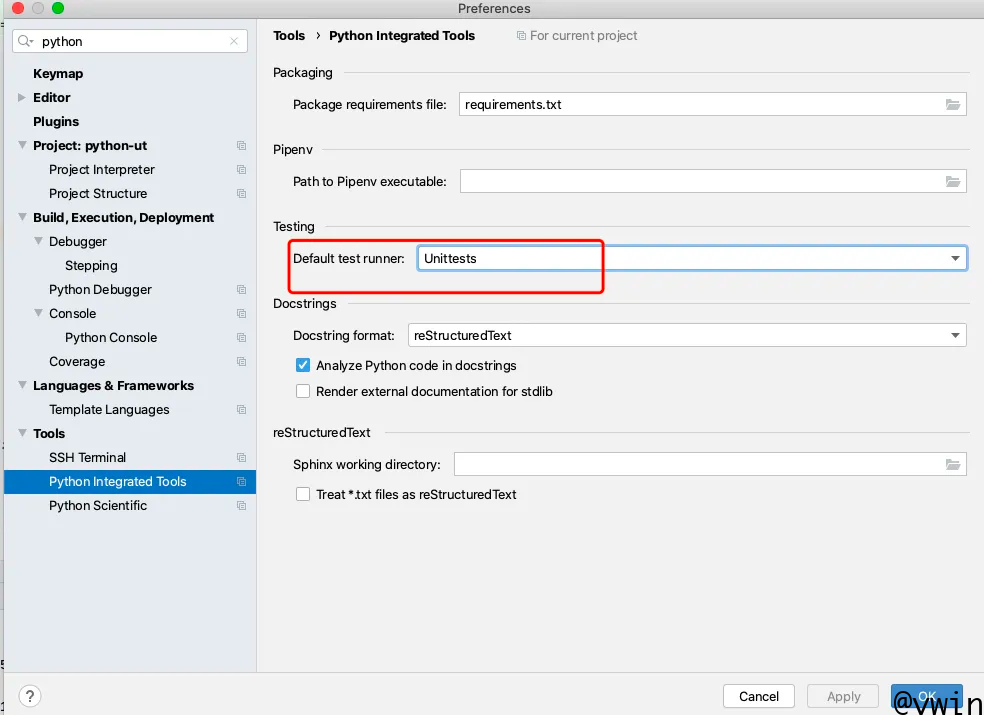
可能的问题 报告没生成 如果出现不了报告,pycharm运行的时候,记得选择python,而不是Python tests
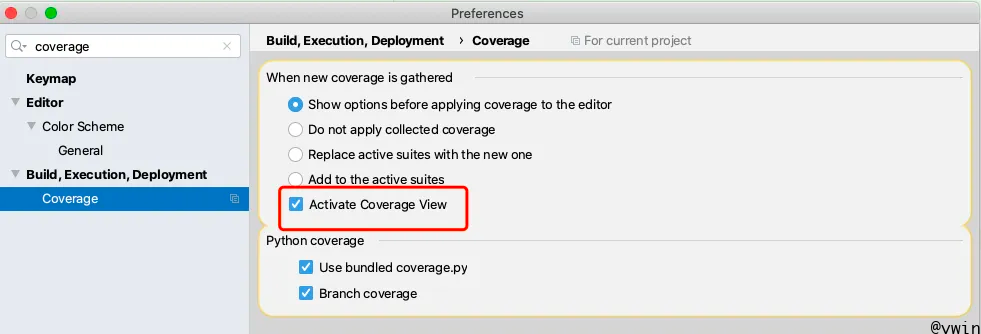
在Pycharm中配置覆盖率展示 可选择unittest和pytest为默认runner
可显示覆盖率窗口:
情景示例 概览 项目介绍 一个简单的博客系统,包含:
项目结构 1 2 3 4 5 6 7 8 9 10 11 12 13 14 15 16 17 18 19 20 21 22 23 ├── README.md ├── requirements.txt └── src ├── blog │ ├── __init__.py │ ├── app.py │ ├── commands.py │ ├── database.db │ ├── init_db.py │ ├── models.py │ └── queries.py └── tests └── blog ├── __init__.py ├── conftest.py ├── schemas │ ├── Article.json │ ├── ArticleList.json │ └── __init__.py ├── test_app.py ├── test_commands.py └── test_queries.py
关键技术
Flask,web框架
SQLite,轻量级数据库,文件格式
pytest,单元测试框架
Pydantic,数据校验
Service测试 创建文章 models.py如下:
1 2 3 4 5 6 7 8 9 10 11 12 13 14 15 16 17 18 19 20 21 22 23 24 25 26 27 28 29 30 31 32 33 34 35 36 37 38 39 40 41 42 43 44 45 46 47 48 49 50 51 52 53 54 55 56 57 58 59 60 61 62 63 64 65 66 67 68 69 70 71 72 73 74 75 76 77 78 79 80 81 82 83 84 85 86 87 88 89 import osimport sqlite3import uuidfrom typing import List from pydantic import BaseModel, EmailStr, Fieldclass NotFound (Exception ):pass class Article (BaseModel ): id : str = Field(default_factory=lambda : str (uuid.uuid4())) author: EmailStr title: str content: str @classmethod def get_by_id (cls, article_id: str ): con = sqlite3.connect(os.getenv('DATABASE_NAME' , 'database.db' )) con.row_factory = sqlite3.Row cur = con.cursor() cur.execute("SELECT * FROM articles WHERE id=?" , (article_id,)) record = cur.fetchone() if record is None : raise NotFound article = cls(**record) con.close() return article @classmethod def get_by_title (cls, title: str ): con = sqlite3.connect(os.getenv('DATABASE_NAME' , 'database.db' )) con.row_factory = sqlite3.Row cur = con.cursor() cur.execute("SELECT * FROM articles WHERE title = ?" , (title,)) record = cur.fetchone() if record is None : raise NotFound article = cls(**record) con.close() return article @classmethod def list (cls ) -> List ['Article' ]: con = sqlite3.connect(os.getenv('DATABASE_NAME' , 'database.db' )) con.row_factory = sqlite3.Row cur = con.cursor() cur.execute("SELECT * FROM articles" ) records = cur.fetchall() articles = [cls(**record) for record in records] con.close() return articles def save (self ) -> 'Article' : with sqlite3.connect(os.getenv('DATABASE_NAME' , 'database.db' )) as con: cur = con.cursor() cur.execute( "INSERT INTO articles (id,author,title,content) VALUES(?, ?, ?, ?)" , (self.id , self.author, self.title, self.content) ) con.commit() return self @classmethod def create_table (cls, database_name='database.db' ): conn = sqlite3.connect(database_name) conn.execute( 'CREATE TABLE IF NOT EXISTS articles (id TEXT, author TEXT, title TEXT, content TEXT)' ) conn.close()
commands.py如下:
1 2 3 4 5 6 7 8 9 10 11 12 13 14 15 16 17 18 19 20 21 22 23 24 25 26 27 28 29 30 from pydantic import BaseModel, EmailStrfrom src.blog.models import Article, NotFoundclass AlreadyExists (Exception ): pass class CreateArticleCommand (BaseModel ): author: EmailStr title: str content: str def execute (self ) -> Article: try : Article.get_by_title(self.title) raise AlreadyExists except NotFound: pass article = Article( author=self.author, title=self.title, content=self.title ).save() return article
单元测试test_commands.py:
1 2 3 4 5 6 7 8 9 10 11 12 13 14 15 16 17 18 19 20 21 22 23 24 25 26 27 28 29 30 31 32 33 34 35 36 37 38 39 40 41 42 43 44 45 46 47 48 49 50 51 52 53 54 55 56 57 58 59 60 61 62 63 64 65 66 67 68 69 70 71 72 73 74 75 76 77 78 79 80 81 import pytestfrom src.blog.commands import CreateArticleCommand, AlreadyExistsfrom src.blog.models import Articledef test_create_article (): """ GIVEN CreateArticleCommand with a valid properties author, title and content WHEN the execute method is called THEN a new Article must exist in the database with the same attributes """ cmd = CreateArticleCommand( author='john@doe.com' , title='New Article' , content='Super awesome article' ) article = cmd.execute() db_article = Article.get_by_id(article.id ) assert db_article.id == article.id assert db_article.author == article.author assert db_article.title == article.title assert db_article.content == article.content def test_create_article_with_mock (monkeypatch ): """ GIVEN CreateArticleCommand with valid properties author, title and content WHEN the execute method is called THEN a new Article must exist in the database with same attributes """ article = Article( author='john@doe.com' , title='New Article' , content='Super awesome article' ) monkeypatch.setattr ( Article, 'save' , lambda self: article ) cmd = CreateArticleCommand( author='john@doe.com' , title='New Article' , content='Super awesome article' ) db_article = cmd.execute() assert db_article.id == article.id assert db_article.author == article.author assert db_article.title == article.title assert db_article.content == article.content def test_create_article_already_exists (): """ GIVEN CreateArticleCommand with a title of some article in database WHEN the execute method is called THEN the AlreadyExists exception must be raised """ Article( author='jane@doe.com' , title='New Article' , content='Super extra awesome article' ).save() cmd = CreateArticleCommand( author='john@doe.com' , title='New Article' , content='Super awesome article' ) with pytest.raises(AlreadyExists): cmd.execute()
当多次运行时候,需要清理数据库,那么需要使用到用例前置和后置:
confest.py:
1 2 3 4 5 6 7 8 9 10 11 12 13 14 15 16 17 import osimport tempfileimport pytestfrom src.blog.models import Article@pytest.fixture(autouse=True ) def database (): _, file_name = tempfile.mkstemp() os.environ['DATABASE_NAME' ] = file_name Article.create_table(database_name=file_name) yield os.unlink(file_name)
再次运行,执行结果:
1 2 3 4 5 6 7 8 9 10 11 $ python3 -m pytest src/tests/blog/test_commands.py =================== test session starts ====================== platform darwin -- Python 3.8.3, pytest-6.2.2, py-1.10.0, pluggy-0.13.1 rootdir: python-ut plugins: metadata-1.11.0, html-3.1.1, mock-3.5.1 collected 3 items src/tests/blog/test_commands.py ... [100%] ===================== 3 passed in 0.02s =======================
获取文章列表 queries.py:
1 2 3 4 5 6 7 8 9 10 11 12 13 14 15 from typing import List from pydantic import BaseModelfrom src.blog.models import Articleclass ListArticlesQuery (BaseModel ): def execute (self ) -> List [Article]: articles = Article.list () return articles
单元测试test_queries.py:
1 2 3 4 5 6 7 8 9 10 11 12 13 14 15 16 17 18 19 20 21 22 23 24 25 from src.blog.models import Articlefrom src.blog.queries import ListArticlesQuery, GetArticleByIDQuerydef test_list_articles (): """ GIVEN 2 articles stored in the database WHEN the execute method is called THEN it should return 2 articles """ Article( author='jane@doe.com' , title='New Article' , content='Super extra awesome article' ).save() Article( author='jane@doe.com' , title='Another Article' , content='Super awesome article' ).save() query = ListArticlesQuery() assert len (query.execute()) == 2
其他功能测试 应用入口app.py:
1 2 3 4 5 6 7 8 9 10 11 12 13 14 15 16 17 18 19 20 21 22 23 24 25 26 27 28 29 30 31 32 33 34 35 36 37 38 39 40 from flask import Flask, jsonify, requestfrom src.blog.commands import CreateArticleCommandfrom src.blog.queries import GetArticleByIDQuery, ListArticlesQueryfrom pydantic import ValidationErrorapp = Flask(__name__) @app.route('/articles/' , methods=['POST' ] def create_article (): cmd = CreateArticleCommand(**request.json) return jsonify(cmd.execute().dict ()) @app.route('/articles/<article_id>/' , methods=['GET' ] def get_article (article_id ): query = GetArticleByIDQuery( id =article_id ) return jsonify(query.execute().dict ()) @app.route('/articles/' , methods=['GET' ] def list_articles (): query = ListArticlesQuery() records = [record.dict () for record in query.execute()] return jsonify(records) @app.errorhandler(ValidationError ) def handle_validation_exception (error ): response = jsonify(error.errors()) response.status_code = 400 return response if __name__ == '__main__' : app.run()
暴露json schema,校验响应payload:
Article.json
1 2 3 4 5 6 7 8 9 10 11 12 13 14 15 16 17 18 19 20 21 22 23 24 25 26 { "$schema" : "http://json-schema.org/draft-07/schema#" , "title" : "Article" , "type" : "object" , "properties" : { "id" : { "type" : "string" } , "author" : { "type" : "string" } , "title" : { "type" : "string" } , "content" : { "type" : "string" } } , "required" : [ "id" , "author" , "title" , "content" ] }
ArticleList.json
1 2 3 4 5 6 7 8 9 { "$schema" : "http://json-schema.org/draft-07/schema#" , "title" : "ArticleList" , "type" : "array" , "items" : { "$ref" : "file:Article.json" } }
从应用本身,串起来整个流程的测试,测试test_app.py:
1 2 3 4 5 6 7 8 9 10 11 12 13 14 15 16 17 18 19 20 21 22 23 24 25 26 27 28 29 30 31 32 33 34 35 36 37 38 39 40 41 42 43 44 45 46 47 48 49 50 51 52 53 54 55 56 57 58 59 60 61 62 63 64 65 66 67 68 69 70 71 72 73 74 75 76 77 78 79 80 81 82 83 84 85 86 87 88 89 90 91 92 93 94 95 96 97 98 99 100 101 102 103 104 105 106 107 108 109 110 111 112 113 114 115 116 117 118 119 120 121 122 123 124 125 126 127 import jsonimport pathlibimport pytestfrom jsonschema import validate, RefResolverfrom src.blog.app import appfrom src.blog.models import Article@pytest.fixture def client ():app.config['TESTING' ] = True with app.test_client() as client: yield client def validate_payload (payload, schema_name ): """ Validate payload with selected schema """ schemas_dir = str ( f'{pathlib.Path(__file__).parent.absolute()} /schemas' ) schema = json.loads(pathlib.Path(f'{schemas_dir} /{schema_name} ' ).read_text()) validate( payload, schema, resolver=RefResolver( 'file://' + str (pathlib.Path(f'{schemas_dir} /{schema_name} ' ).absolute()), schema ) ) def test_create_article (client ): """ GIVEN request data for new article WHEN endpoint /articles/ is called THEN it should return Article in json format matching schema """ data = { 'author' : 'john@doe.com' , 'title' : 'New Article' , 'content' : 'Some extra awesome content' } response = client.post( '/articles/' , data=json.dumps(data), content_type='application/json' , ) validate_payload(response.json, 'Article.json' ) def test_get_article (client ): """ GIVEN ID of article stored in the database WHEN endpoint /articles/<id-of-article>/ is called THEN it should return Article in json format matching schema """ article = Article( author='jane@doe.com' , title='New Article' , content='Super extra awesome article' ).save() response = client.get( f'/articles/{article.id } /' , content_type='application/json' , ) validate_payload(response.json, 'Article.json' ) def test_list_articles (client ): """ GIVEN articles stored in the database WHEN endpoint /articles/ is called THEN it should return list of Article in json format matching schema """ Article( author='jane@doe.com' , title='New Article' , content='Super extra awesome article' ).save() response = client.get( '/articles/' , content_type='application/json' , ) validate_payload(response.json, 'ArticleList.json' ) @pytest.mark.parametrize( 'data' ,[ { 'author' : 'John Doe' , 'title' : 'New Article' , 'content' : 'Some extra awesome content' }, { 'author' : 'John Doe' , 'title' : 'New Article' , }, { 'author' : 'John Doe' , 'title' : None , 'content' : 'Some extra awesome content' } ] def test_create_article_bad_request (client, data ): """ GIVEN request data with invalid values or missing attributes WHEN endpoint /create-article/ is called THEN it should return status 400 and JSON body """ response = client.post( '/articles/' , data=json.dumps(data), content_type='application/json' , ) assert response.status_code == 400 assert response.json is not None
小结https://github.com/vwin/python-ut
结语 小结 Python的单元测试框架中,Python库本身提供了unittest,也有第三方框架进行了封装。原生的库插件少,二次开发非常方便。第三方框架融合了不少插件,上手简单。
相关阅读 Python Testing Tools Taxonomy Modern Test-Driven Development in Python